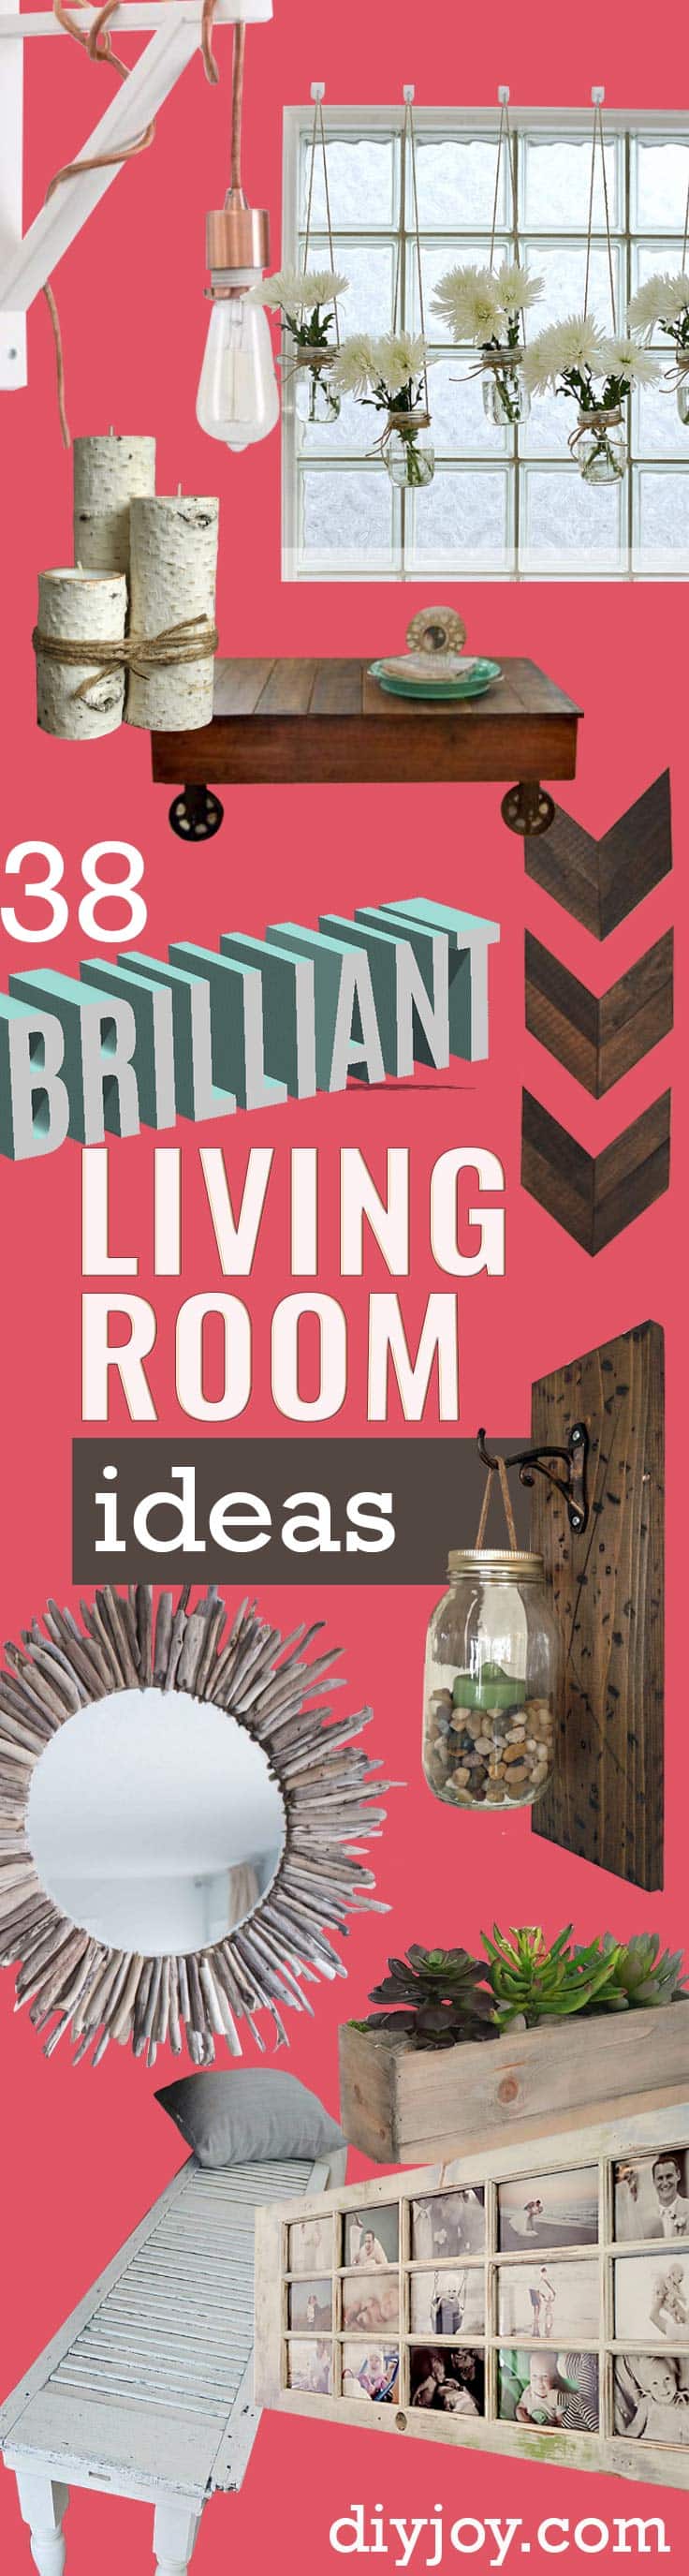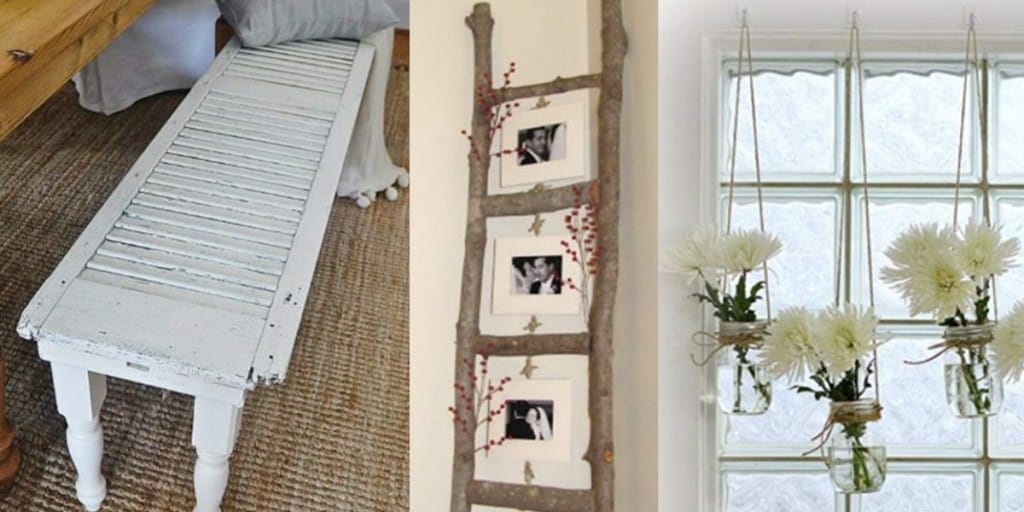
The living room works harder than any other space in the house, and it’s usually the first room guests judge. Good news: you don’t need a new sofa to change how it feels. These DIY living room decor ideas cover the whole room, from a fluted coffee table and a tufted pallet ottoman to wood star wall art, photo ledges, birch candle holders, drop cloth curtains and a copper rope basket for all those throws. Most of them start with lumber offcuts, thrift store frames or dollar store glass, so the budget stays small even when the finished piece looks custom. You’ll also find DIY JOY originals with full step by step videos, like a Roman shade made from a mini blind, bandana pillows and a glowing fairy jar lamp. Pick one project for this weekend and see how far a little paint and hot glue can go!
Table of Contents
- DIY Coffee Tables
- 1. Round Coffee Table DIY
- 2. How to Make a Jute Rope Tray
- DIY Wall Art Ideas
- 3. DIY Canvas Art Made With Wrapping Paper
- 4. DIY Wood Stars
- 5. Colorful DIY Wall Art
- 6. Easy DIY String Art
- 7. DIY Wooden Arrow Tutorial
- DIY Photo Frames
- 8. DIY Hanging Frames
- 9. DIY Rustic Photo Ladder
- 10. DIY Picture Frame Suncatcher
- 11. Easy DIY Picture Ledges
- 12. Textured Heart Canvas Art
- DIY Pillows and Ottomans
- 13. DIY Tufted Ikat Ottoman
- 14. How to Make Bandana Pillows
- DIY Candles and Candle Holders
- 15. Rosemary Pressed Herb Candles
- 16. DIY Candle Holders
- 17. Easy DIY Napkin Paper Candle
- Planters & Vases
- 18. Rustic Wood Shim Vase
- 19. DIY Decoupage Vase Using Napkin Paper
- 20. DIY Book Flower Vase
- DIY Wall and Shelf Decor
- 21. Easy DIY Wall Stencil With Paint Pen
- 22. How to Make a Clay Flower Mirror
- 23. Driftwood Sailboat Tutorial
- Curtains & Window Treatments
- 24. DIY Drop Cloth Curtains
- 25. DIY Curtain Tie Backs
- 26. DIY Barnwood Shutters
- 27. $12 DIY Roman Shade From a Mini Blind
- DIY Baskets, Lanterns and Lighting
- 28. DIY Metallic Rope Throw Basket
- 29. DIY Beaded Plant Hanger and Lantern
- 30. DIY Hurricane Lanterns
- 31. Easy DIY Fairy Jar Lanterns
- 32. Mason Jar Fairy Lights With Pressed Flowers
DIY Coffee Tables
1. Round Coffee Table DIY
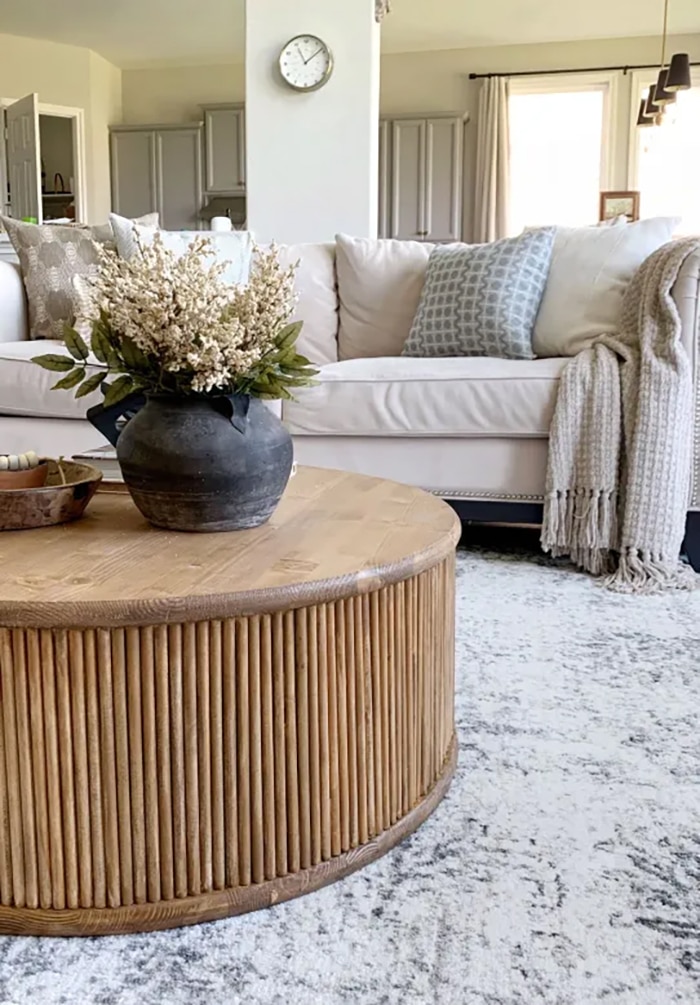
This round fluted coffee table copies a Swedish designer piece that sells for around $2,700, and it skips pocket holes completely. Two precut 36 inch wood rounds form the top and bottom. Between them sit two hidden frames built from 2x4s, which set the height at 14 inches and attach to the rounds with figure 8 fasteners in countersunk holes. About 42 half inch dowels glued around the edge create the reeded look. A wood conditioner, an Early American stain and a coat of Polycrylic finish it off.
Get the full tutorial at Pennies for a Fortune.
2. How to Make a Jute Rope Tray
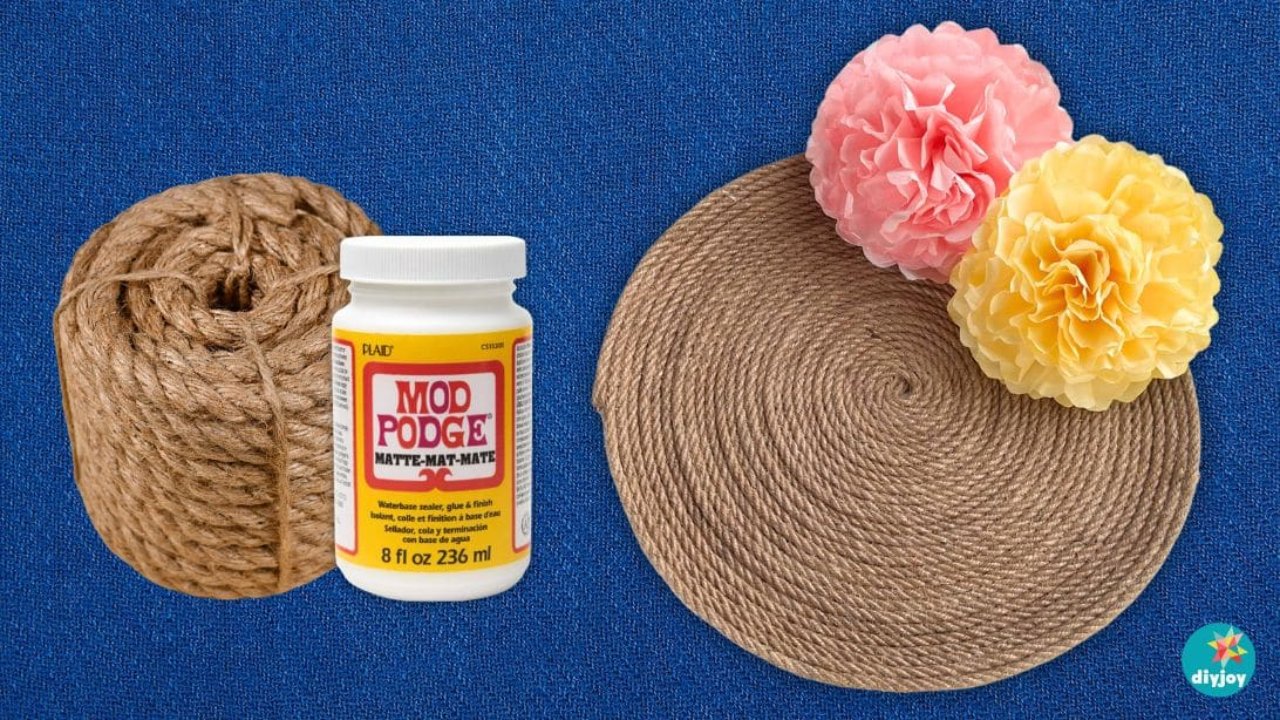
A jute rope tray looks like a boutique boho piece, and the only glue it needs is Mod Podge. Cover a tray with cling wrap so nothing sticks, then brush on a generous coat of Mod Podge. Start the rope at the center and coil it outward in a tight spiral, pressing each round into the glue as you go. Let it dry completely, lift it off the plastic and add another coat for extra stiffness. Most of the supplies come from Dollar Tree, and it makes a handy coffee table catchall.
Get the full tutorial at DIY JOY.
DIY Wall Art Ideas
3. DIY Canvas Art Made With Wrapping Paper
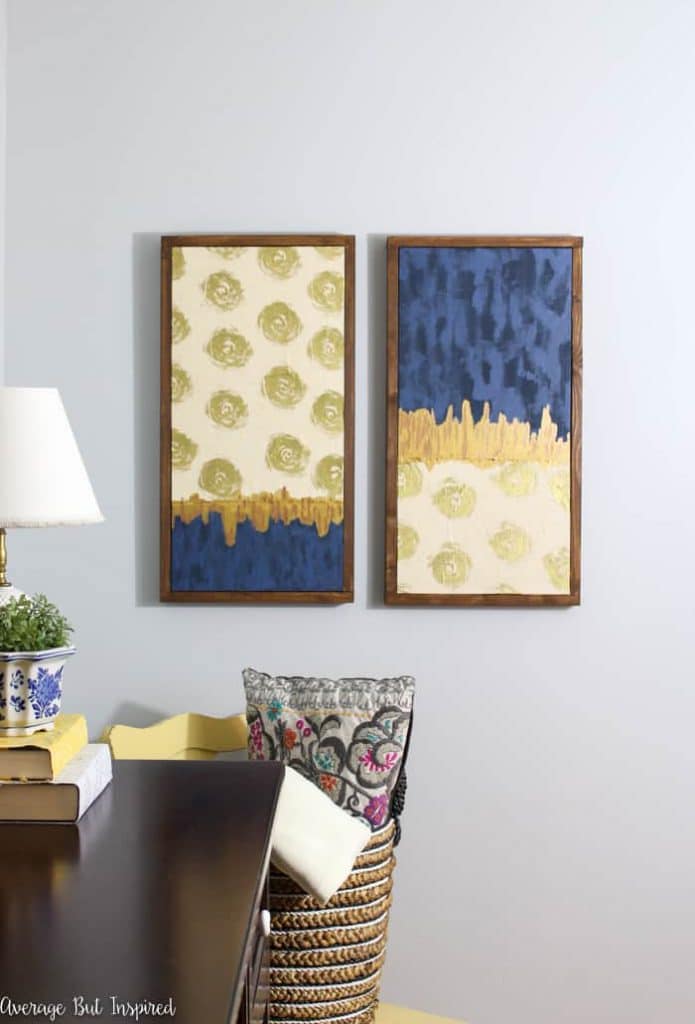
Oversized wall art gets expensive fast, so this pair uses 12 by 24 inch canvas panels and heavyweight luxe wrapping paper. Cut the paper slightly bigger than the area it will cover, brush a thin coat of matte Mod Podge onto the canvas and press it down, rolling out bubbles with a brayer. Paint the rest of the canvas navy, leaving a narrow gap that gets a gold acrylic border. Tape the paper around the back, seal the front with more Mod Podge, then add a few navy brushstrokes and gold leaf streaks for depth.
Get the full tutorial at Average But Inspired.
4. DIY Wood Stars
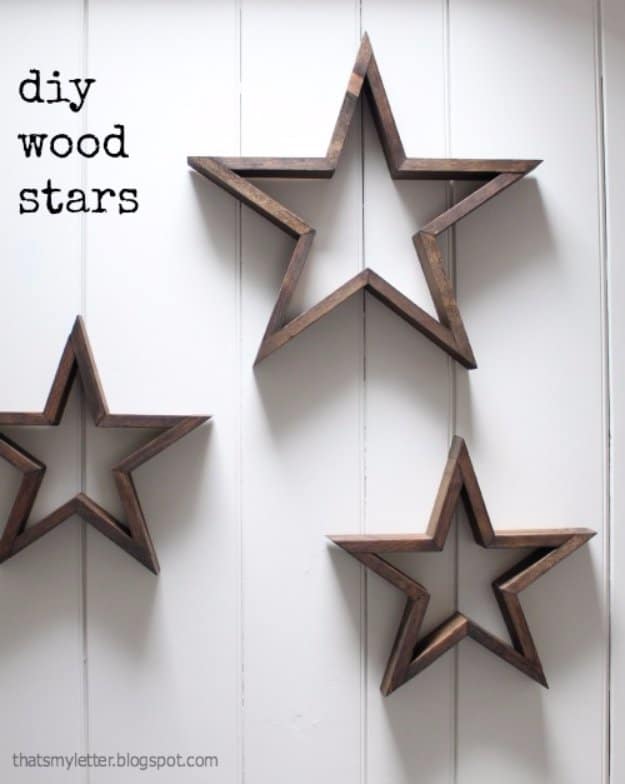
These DIY wood stars knock off a retired Pottery Barn design for about $5 each, depending on how much scrap wood is in the pile. Pine 1×3 boards make a nice depth, though 1×2 or 1×4 work too. The steep five point angles are the tricky part, so a wedge jig on the miter saw helps. Glue and staple each pair of pieces, flip the star and secure the joints with 3/4 inch finish nails. Sand, stain and hang them from a single nail. Odd numbers in mixed sizes look best.
Get the full tutorial at jaimecostiglio.com.
5. Colorful DIY Wall Art
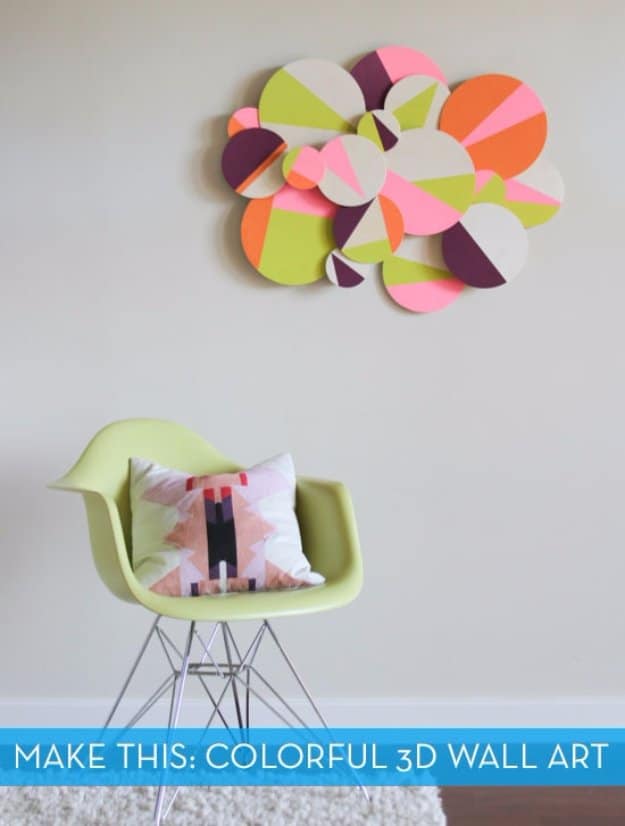
This colorful 3D wall art came in under $50, and it doubles as a photo booth backdrop. Wood circles in 4, 6.5, 8 and 10 inch sizes get taped off and painted in up to five colors, with some bare wood left showing as a color of its own. Dowels cut to four different lengths are glued to the back of each circle, so they stand off the wall at varied heights. A hardboard panel holds everything together, and a sawtooth hanger goes on the back. Stick to five colors so the mix stays balanced.
Get the full tutorial at Curbly.
6. Easy DIY String Art
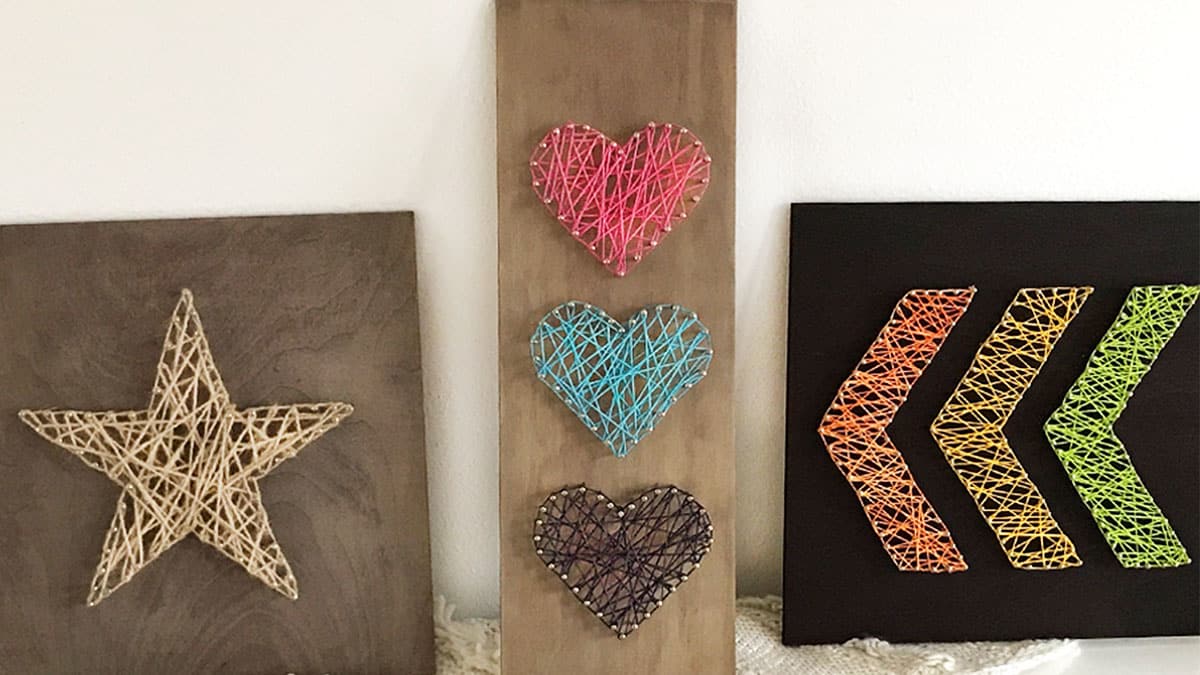
String art looks complicated, but it only takes a printed graphic, a hammer and small nails. Tape the printout to a wood plank and hammer nails around the outline, spacing them evenly, then tear the paper away. Tie twine, cord or embroidery thread to one nail and wrap it back and forth across the shape until it fills in, finishing with a knot. The same method makes a set of hearts, a rustic twine star or a bold chevron arrow. Linoleum nails work well, but most small wire nails will do.
Get the full tutorial at DIY JOY.
7. DIY Wooden Arrow Tutorial
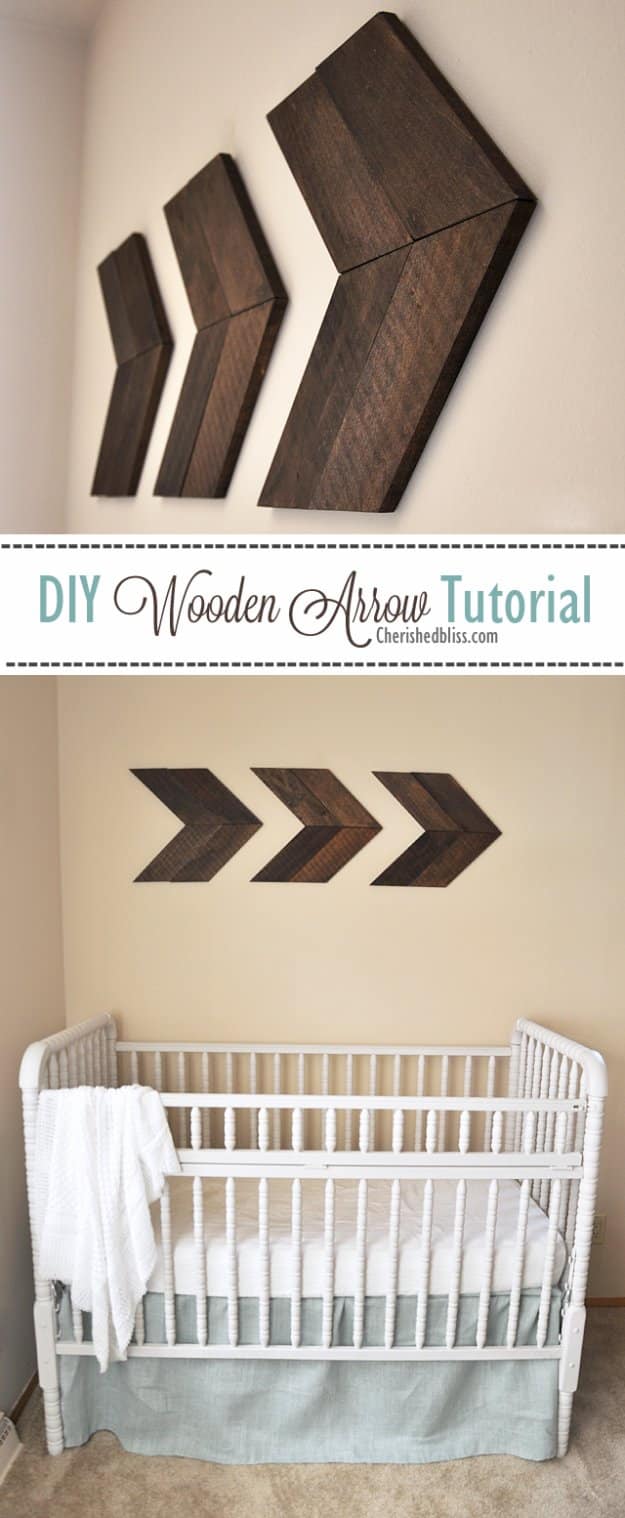
DIY wood arrows are a beginner friendly way to practice 45 degree cuts. Each arrow uses two 24 inch boards of craft wood, about the size of a 1×4, cut in half at a 45 degree angle on a miter saw so the pieces form a chevron. Stain them with a lint free cloth (dark walnut looks great), and skip the sealer if you want a matte finish. Mending plates on the back hold each arrow together, and a sawtooth hanger at the center balances the weight. Active time is about 20 minutes.
Get the full tutorial at The Crafty Blog Stalker.
DIY Photo Frames
8. DIY Hanging Frames
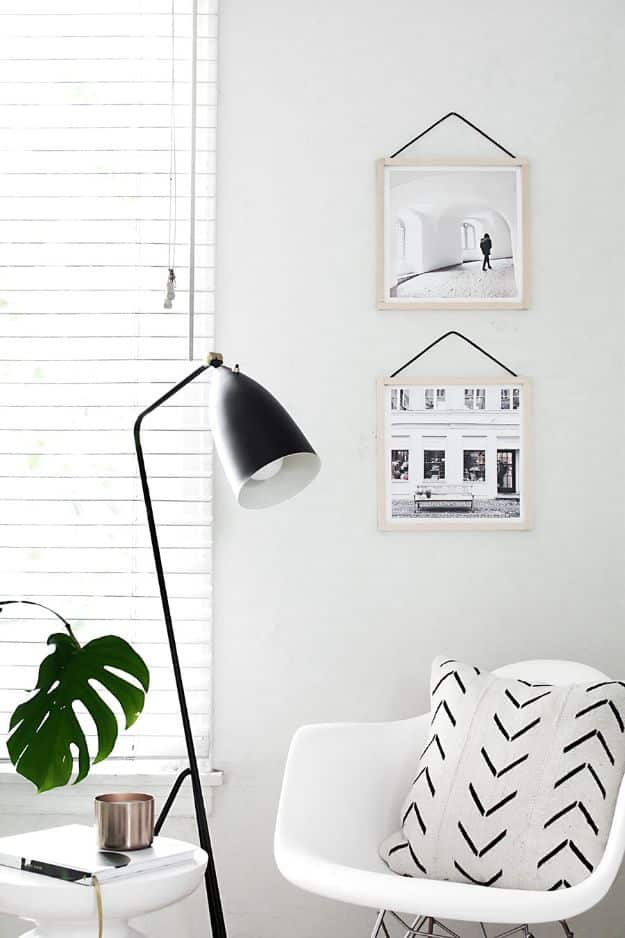
These hanging frames let big photo prints swap in and out without any glass. Cut basswood sticks to about 10.75 inches with a miter box and glue four into a square frame. Thinner strips cut to the same length get a magnet glued at each end, and matching magnets go on the back corners of the frame. Sandwich a large print between them and a hanging cord glued to the top finishes the piece. Craft store magnets are barely strong enough, so choose something a little stronger. Leave the wood natural or stain it.
Get the full tutorial at Homey Oh My.
9. DIY Rustic Photo Ladder
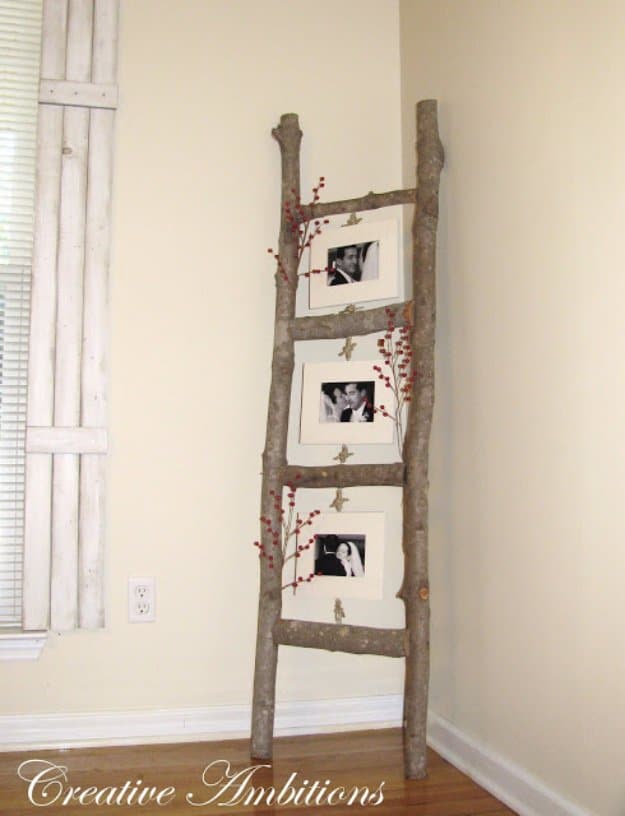
A rustic photo ladder is built from tree branches cut to size and nailed together, and it’s purely decorative, so no climbing allowed. Measure, predrill small holes in the rungs and the photo frames, then twist in screw eyes. S hooks only work if every rung sits at the same height, so hemp string ties each frame to its step instead. Frames painted white with black and white photos inside look crisp against the bark. Tuck in a few leftover berry picks for color. Whitewashed wood rounds can trim the frames too.
Get the full tutorial at Creative Ambitions.
10. DIY Picture Frame Suncatcher
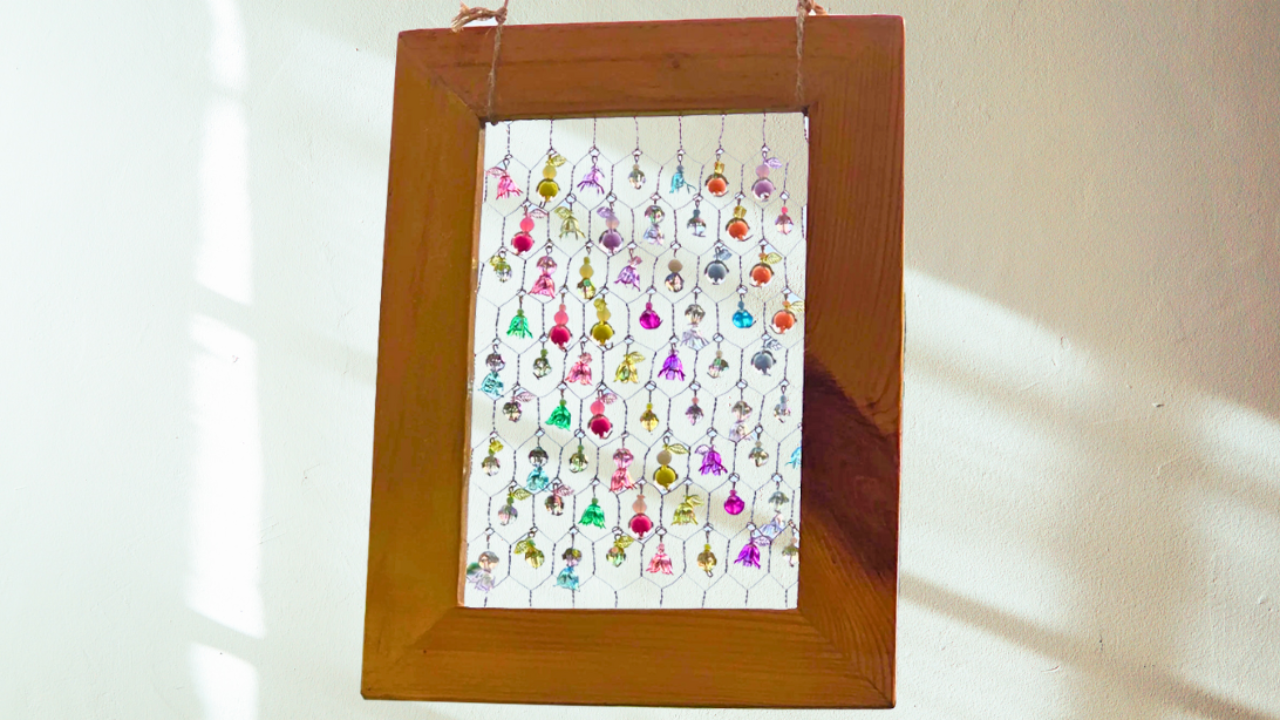
A picture frame suncatcher turns an old frame into a window display that throws sparkles across the room. Cut a piece of chicken wire to fit inside the frame and fasten it securely. Thread beads and charms onto eye pins, bend the ends closed and add one or two jump rings at the top of each so they dangle. Hook the bead sets onto the wire in every opening, then tie jute rope across the top for hanging. Translucent and faceted beads catch the most light, and gloves protect your hands from the wire.
Get the full tutorial at DIY JOY.
11. Easy DIY Picture Ledges
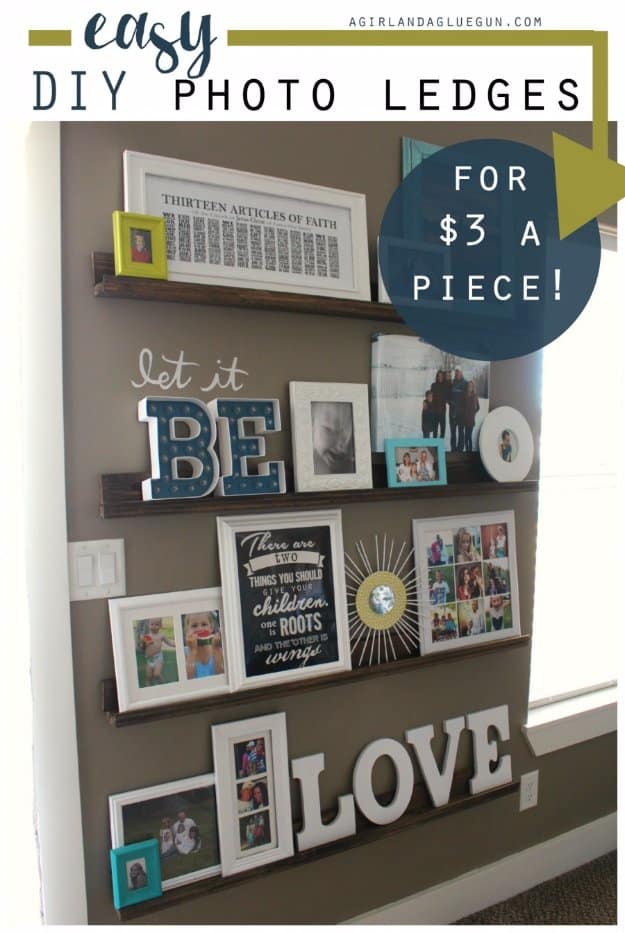
Picture ledges hold a crowd of frames without a single extra nail hole, and each shelf costs about $3. Every shelf uses two strips of lumber, one for the back and one for the bottom, plus a front lip of decorative molding that sits flush with the bottom so frames can’t slide off. The hardware store will cut boards to size for free if you bring your measurements. Glue and nail the pieces together, then stain or paint. Mismatched frames look intentional once they line up on matching ledges.
Get the full tutorial at A Girl and a Glue Gun.
12. Textured Heart Canvas Art
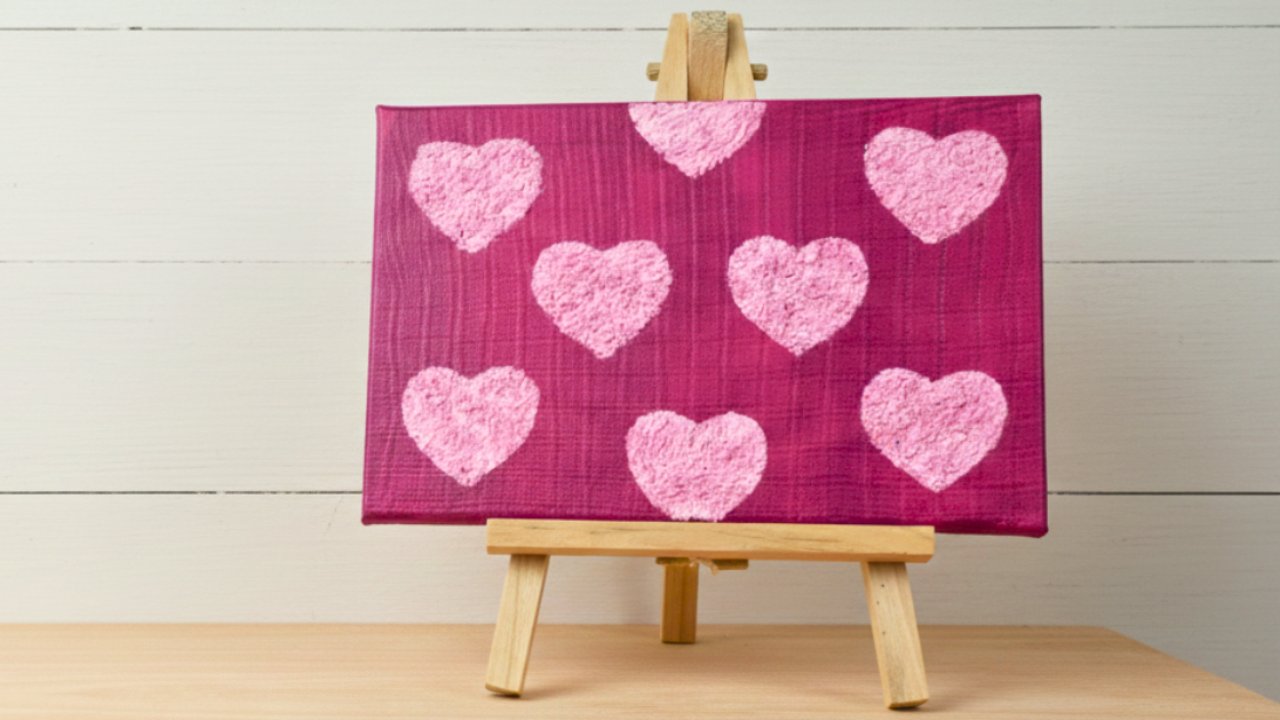
This textured heart canvas uses a paper mache trick that gives a raised, embossed look with no artistic skill required. Paint the canvas a solid color and let it dry, then lightly draw hearts, letters or shapes where you want them. Soak torn tissue paper in water, squeeze it out and tear it smaller, then mix in glue and paint. Spread the mixture inside each outline until no pencil lines show. Smaller, even tissue pieces give a smoother finish, and thicker layers add texture but take longer to dry.
Get the full tutorial at DIY JOY.
DIY Pillows and Ottomans
13. DIY Tufted Ikat Ottoman
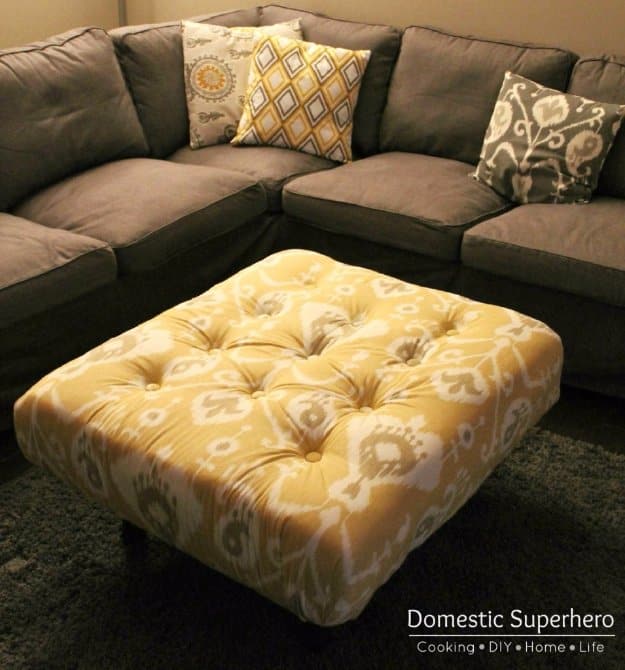
This tufted ottoman starts as a free shipping pallet, trimmed down to fit in front of a sofa. Sand the whole pallet well, then nail plywood across the top and sand the outside edges so the fabric goes on smoothly. Foam and batting come next, followed by a patterned upholstery fabric stapled underneath. Tufting with buttons adds a whole new level of work, but it gives the classic diamond look of a designer piece. A yellow ikat print ties in existing pillows without matching them exactly.
Get the full tutorial at Domestic Superhero.
14. How to Make Bandana Pillows

Bandana pillows bring a pop of pattern to the sofa for just a few dollars each, since dollar store bandanas work perfectly. Place two bandanas right sides together and sew around three sides and part of the fourth with a quarter inch seam, leaving an opening to turn it. Backstitch at the start and end so the seams hold. Turn it right side out, push in a pillow insert or fiberfill and stitch the gap closed. Prefer not to sew? Fabric glue along the same seam lines works too.
Get the full tutorial at DIY JOY.
DIY Candles and Candle Holders
15. Rosemary Pressed Herb Candles
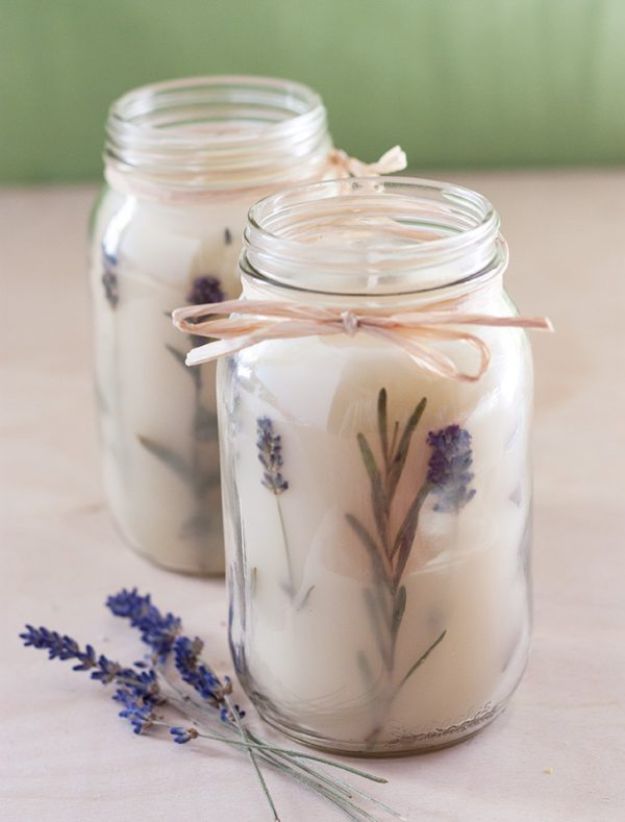
Pressed herb candles preserve the scent and look of the garden inside a mason jar. Each pair of 8 ounce candles uses half a pound each of beeswax and soy wax. Press young rosemary stems flat, dip them in melted wax and brush more wax over them so they stay tight against the glass and away from the flame. Center a tabbed wick with a glue dot and clothespins, stir an evergreen blend of fir, bergamot, cedarwood and juniper oils into the melted wax, then pour. Let them cure 48 hours.
Get the full tutorial at Garden Therapy.
16. DIY Candle Holders
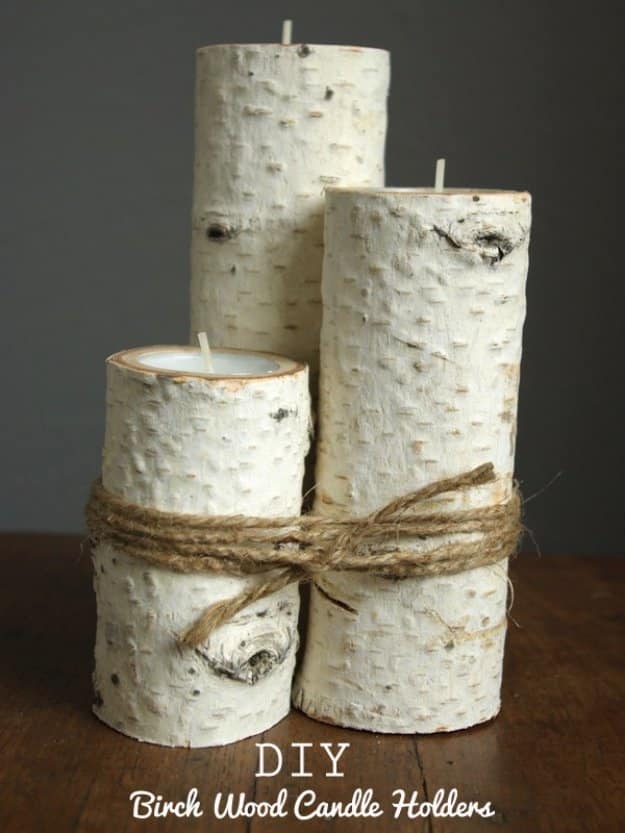
Birch wood candle holders turn the branches of a fallen tree into rustic decor that lasts for years. Cut a set of three branch sections at 8, 6 and 4 inches, then clamp each one down and drill out the top with a 1 1/2 inch bit. A large C clamp keeps the wood still while you drill. Drop a tea light into each opening and replace it whenever it burns out. Twine wrapped around the group ties them together, and they look right at home with pinecones and other natural decor.
Get the full tutorial at Oleander + Palm.
17. Easy DIY Napkin Paper Candle
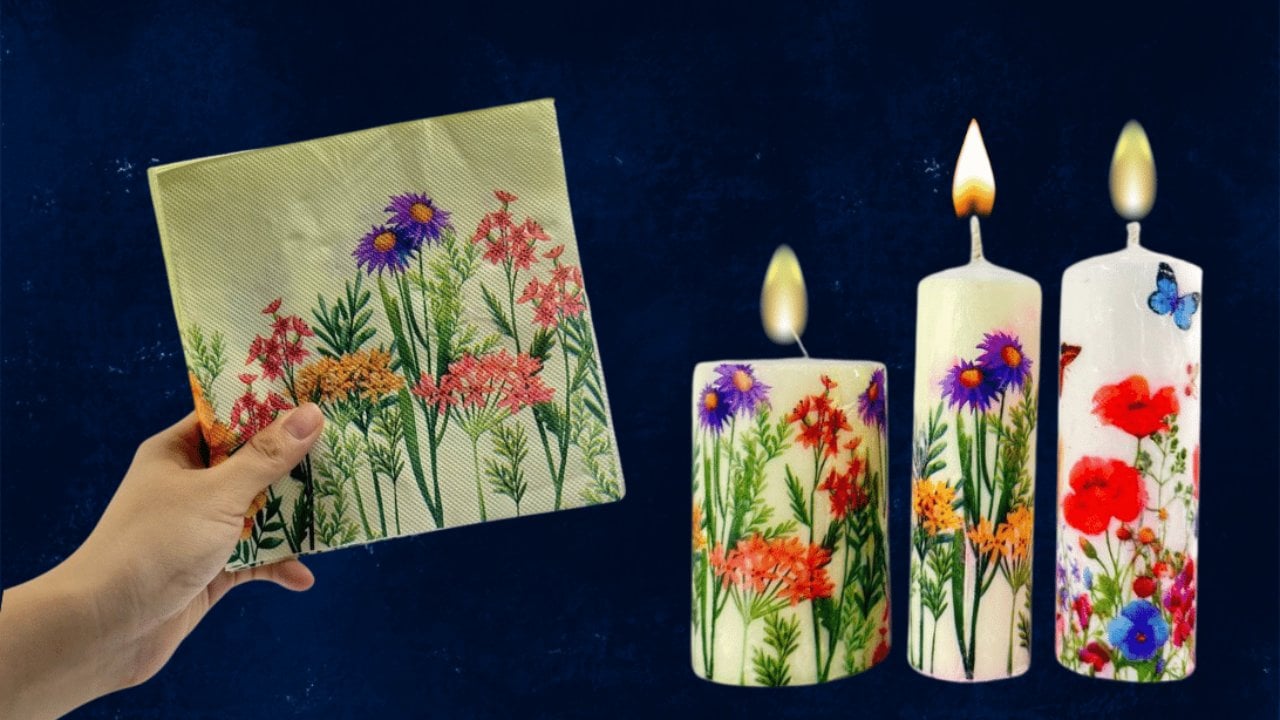
A napkin paper candle dresses up a plain pillar candle in minutes, using just a printed napkin, wax paper and an iron. Separate the napkin layers and keep only the thin printed ply, then trim it to wrap the whole candle. Cover the wrapped candle with wax paper, which helps fuse the print and keeps wax from dripping. Iron gently until the candle’s own wax melts the napkin in place, then peel off the wax paper and iron any loose edges. A ribbon or cord around the base finishes the look.
Get the full tutorial at DIY JOY.
Planters & Vases
18. Rustic Wood Shim Vase
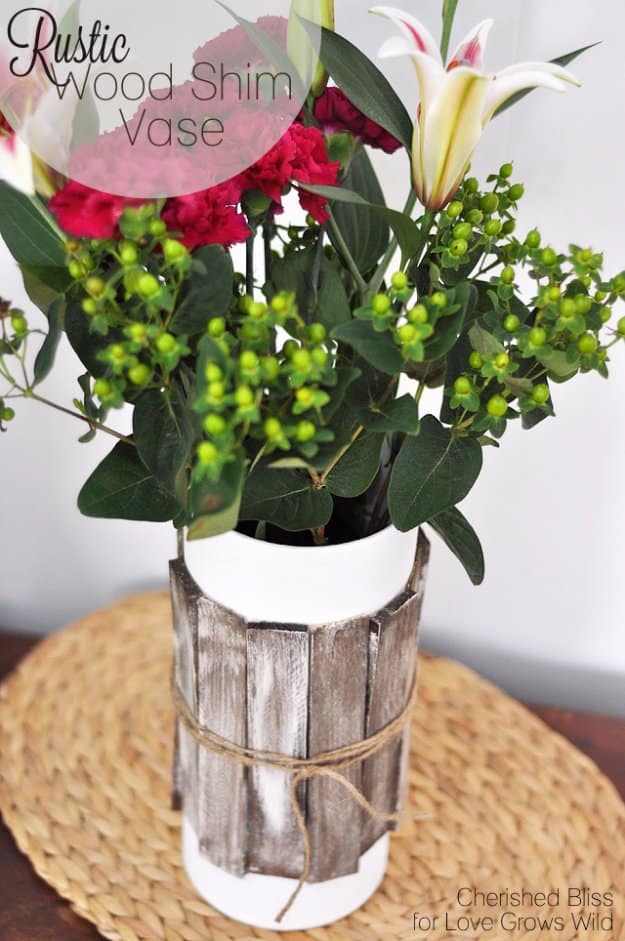
Wood shims cost less than $2 a pack, and they turn a plain cylinder vase into rustic farmhouse decor. Paint the vase first if you like, then mark its center as a guide. The vase must be a true cylinder or the shims won’t line up. Run thick strips of hot glue along the top, middle and bottom of each shim and press it on, alternating thick and thin ends as you go around. Weathering the shims first gives a gray, aged finish. A wrap of twine at the middle ties it together.
Get the full tutorial at Love Grows Wild.
19. DIY Decoupage Vase Using Napkin Paper
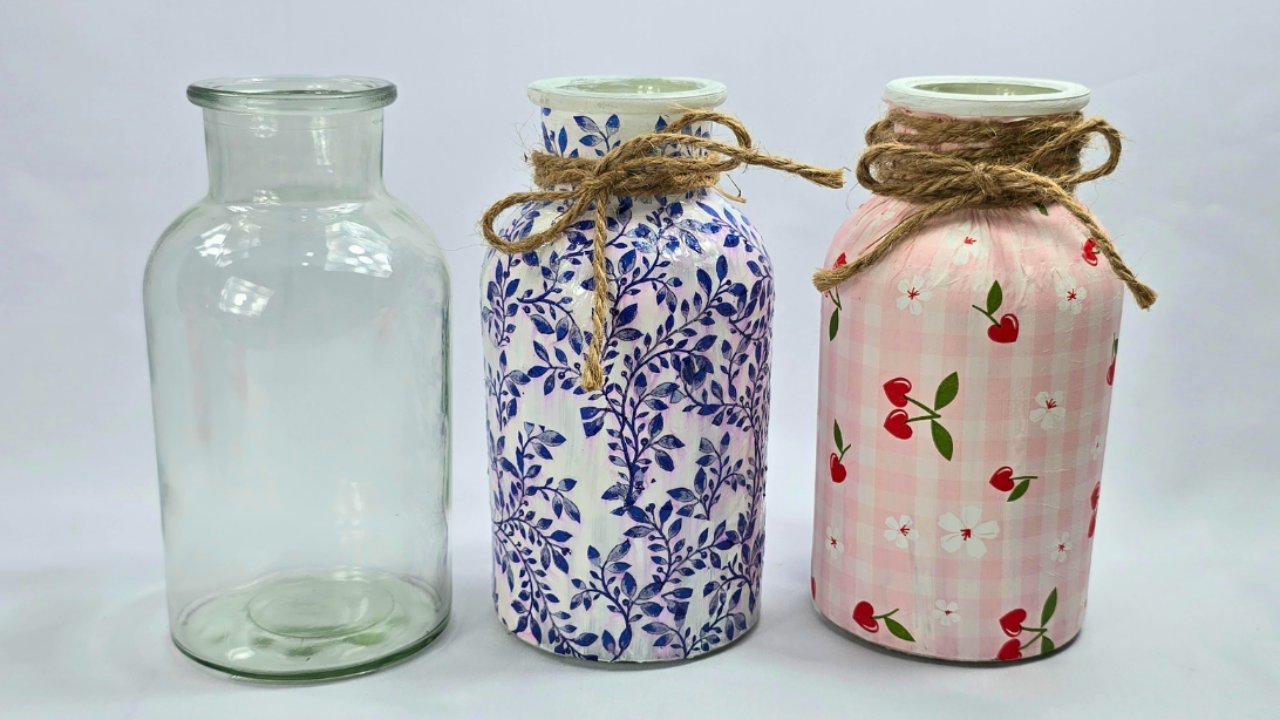
A decoupage vase with napkin paper turns an empty glass jar into something that looks hand painted. Clean the outside of the jar and paint it solid white, adding a second coat so no glass shows through. Cut out the napkin design as closely as you can, then peel off the backing layers so only the thin printed ply is left. Brush Mod Podge onto the jar, lay the napkin on and smooth it gently with the brush, then seal over the top. A twist of jute twine at the neck finishes it.
Get the full tutorial at DIY JOY.
20. DIY Book Flower Vase
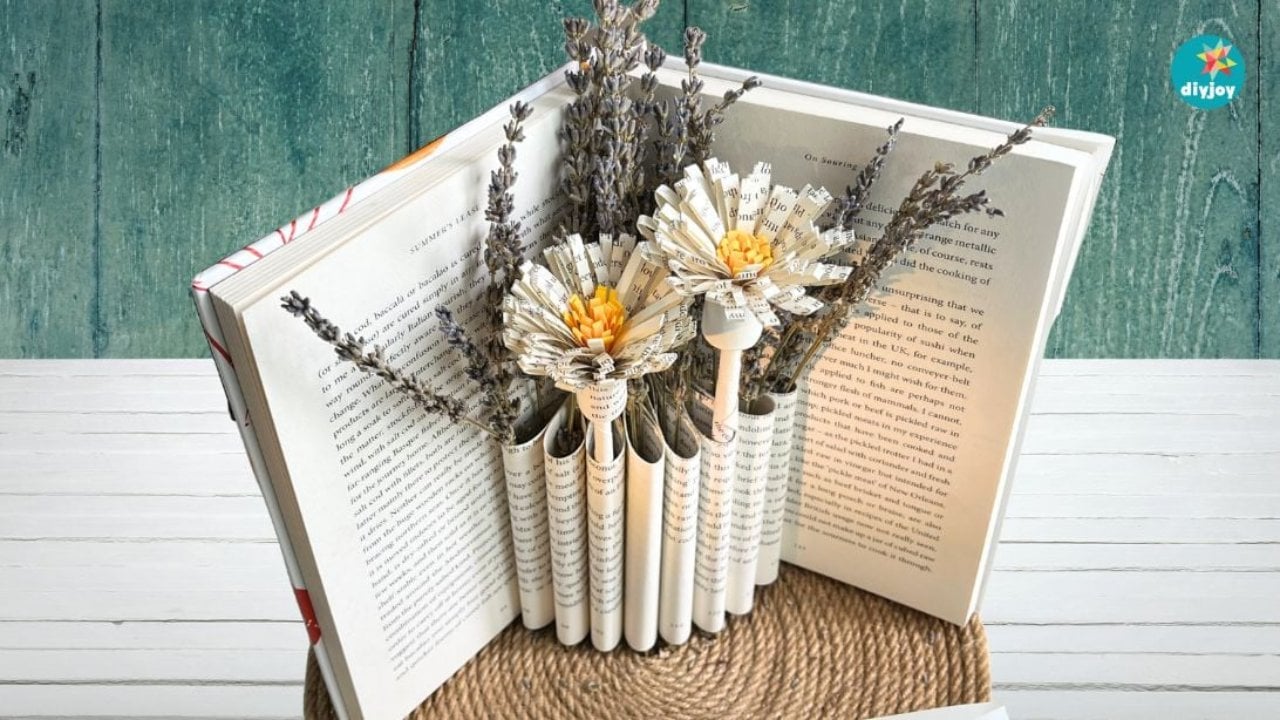
A book flower vase gives an old hardcover a second life as a display for dried or paper flowers. Open the book to its center, draw a line across the middle of the page and count 12 pages out on each side. Slip cardboard under the marked page and cut along the line, then tear away the top section. Move the cut pages to one side, tape them together in groups of three with double sided tape, and fold each group toward the middle. Thrifted or clearance books are perfect for this.
Get the full tutorial at DIY JOY.
DIY Wall and Shelf Decor
21. Easy DIY Wall Stencil With Paint Pen
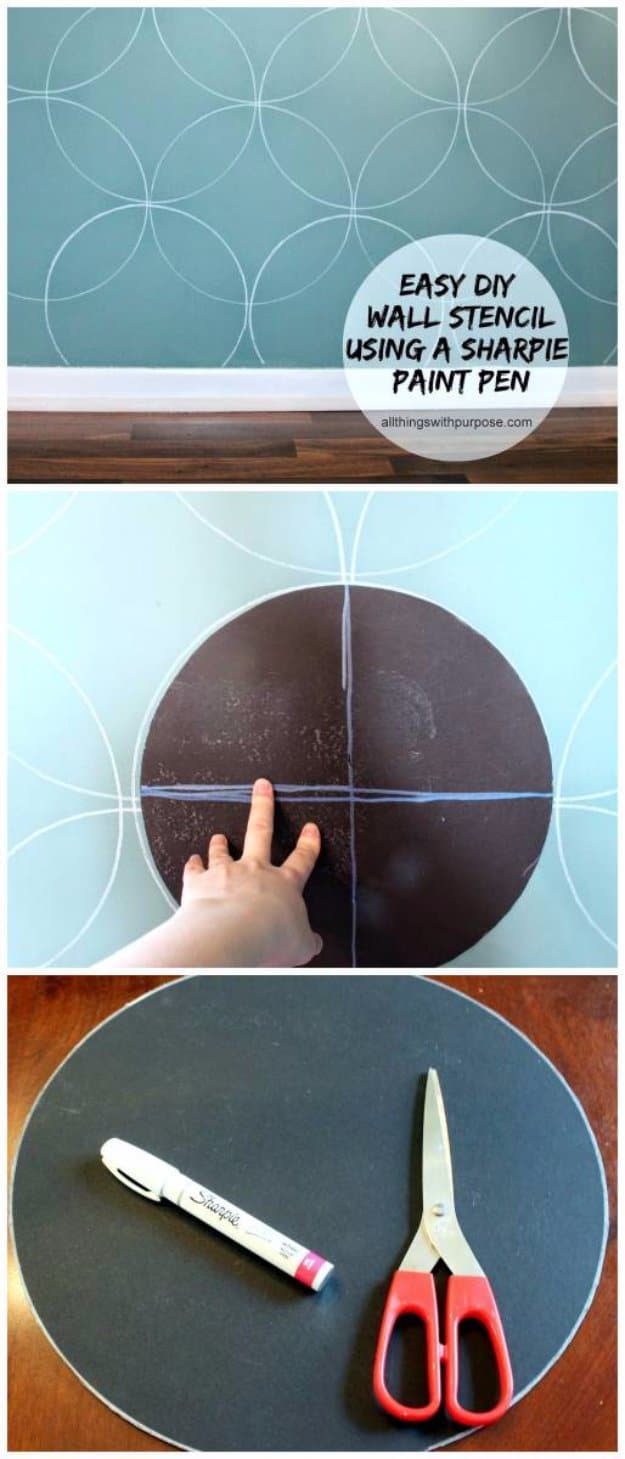
This easy wall stencil takes about an hour and needs no measuring, taping or tracing. Find a plate close to the circle size you want, trace it onto thick cardboard and cut it out. Draw a few rough guidelines across the template with a ruler so it lines up row after row. Starting at the top left of the wall, trace around the circle with a white oil based paint pen, overlapping each circle to build a pattern, then work down and across. Fold the cardboard to reach into corners.
Get the full tutorial at All Things with Purpose.
22. How to Make a Clay Flower Mirror
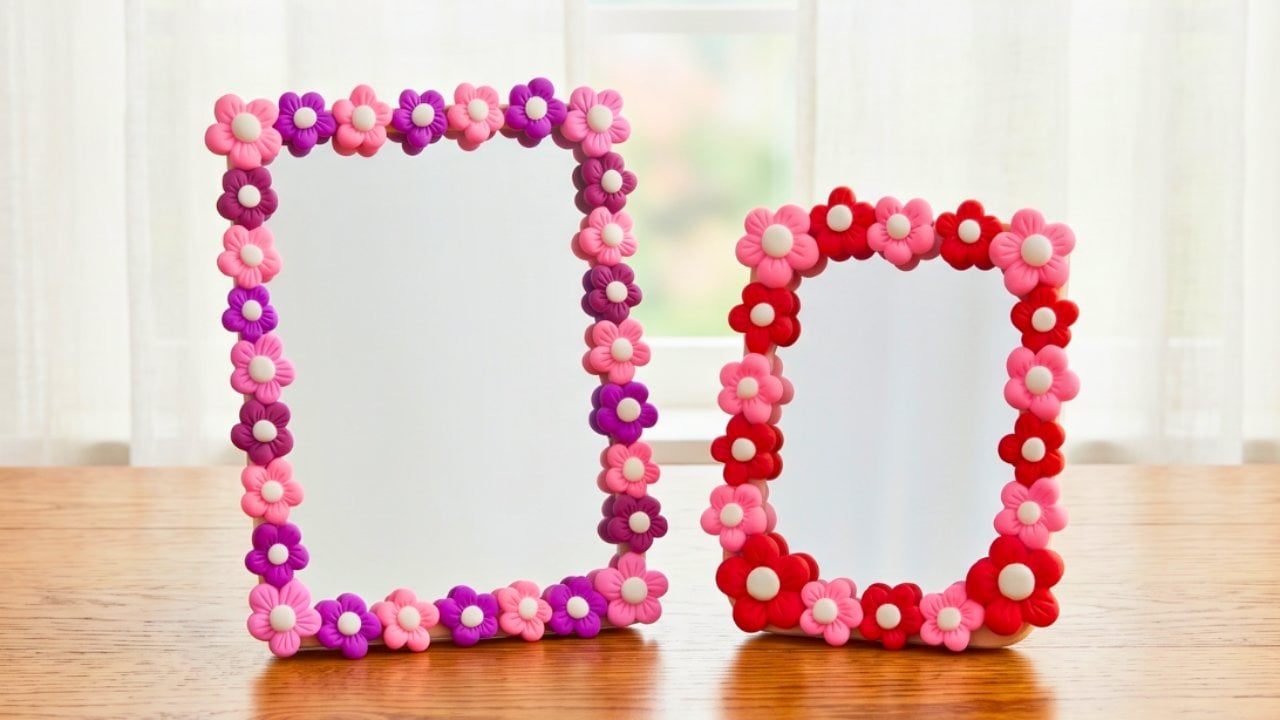
A clay flower mirror turns a plain or dollar store mirror into a statement piece in about an hour. Roll soft clay into smooth balls and press three lines into the bottom of each with a sculpting tool so they meet at a point, making five petals per flower. Arrange the petals in a ring with a small white ball in the center, varying colors and sizes. Let the flowers firm up until they are no longer sticky, plan the layout, then hot glue them around the frame. Gloss varnish prevents cracking.
Get the full tutorial at DIY JOY.
23. Driftwood Sailboat Tutorial
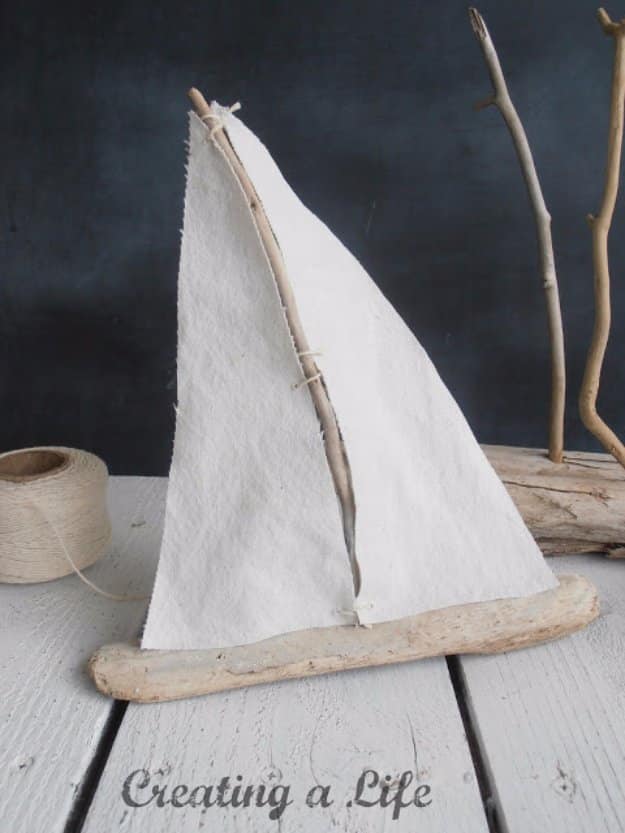
Driftwood sailboats bring a little beach house charm to any shelf. Pick three chunky pieces of driftwood for the hulls and three thin branches for the masts, then drill a hole in each hull sized to its mast. Hot glue is fine for display boats, but Gorilla Glue holds up better if they’ll be played with. Trace sail shapes onto canvas (an old ironing board cover works) and cut them out. Attach the sails three ways, laced with heavy cotton string, glued or tied, for a little variety.
Get the full tutorial at Creating A Life Studio.
Curtains & Window Treatments
24. DIY Drop Cloth Curtains
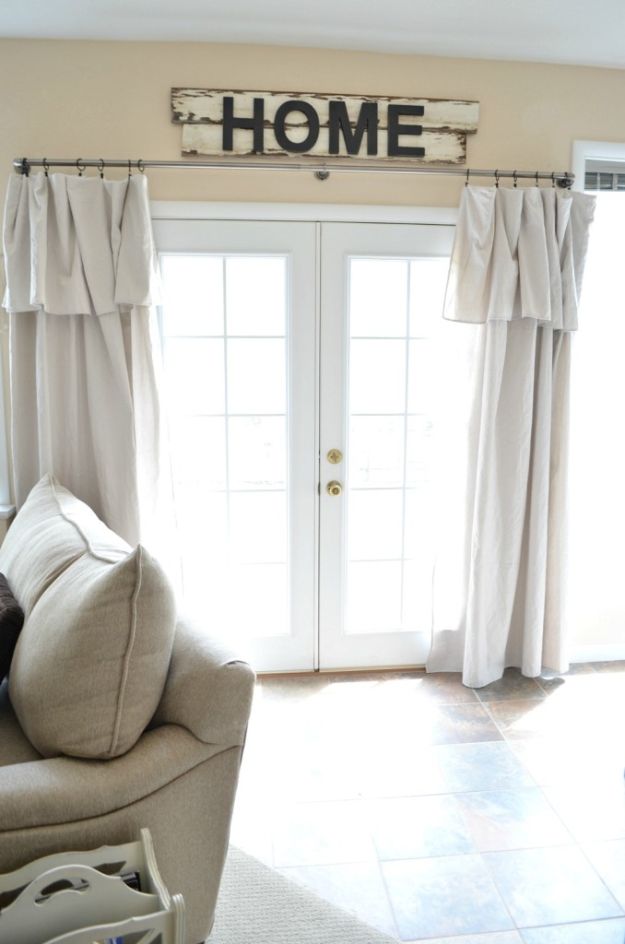
Drop cloth curtains are a no sew window treatment that costs a fraction of store bought panels. Canvas drop cloths from the hardware store measure 6 by 9 feet, so they cover wide windows and suit tall ceilings or doorways. Wash, dry and iron them (the ironing is optional), then decide how much to fold over at the top and how much to puddle on the floor. Drapery clip rings spaced about 9 to 10 inches apart, seven per panel, hang them from the rod. The hemmed edges come finished already.
Get the full tutorial at sarahjoyblog.com.
25. DIY Curtain Tie Backs
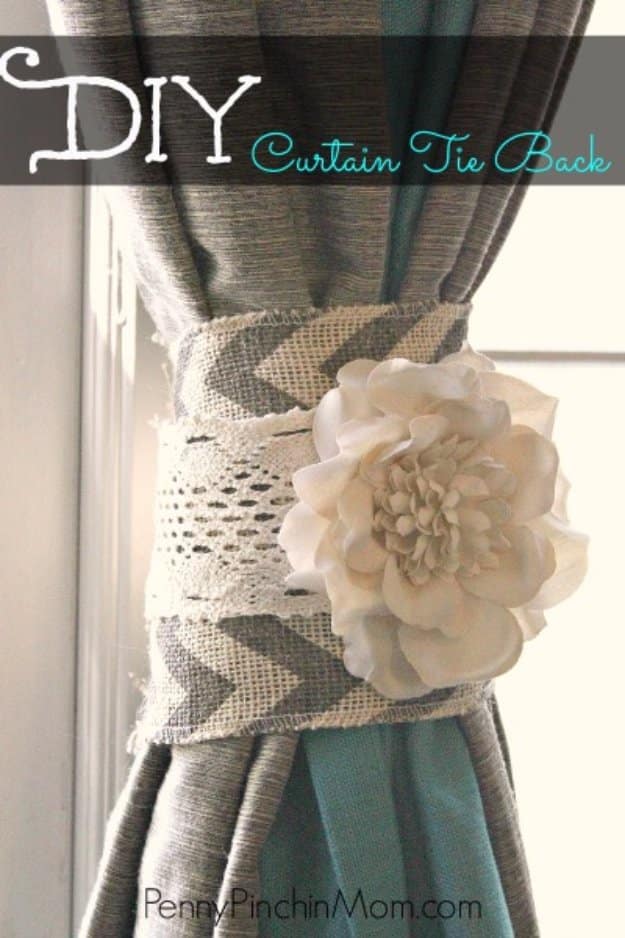
These shabby chic curtain tie backs take about 15 minutes and a handful of supplies. Cut burlap ribbon and fancy lace ribbon to the same length, somewhere between 9 and 12 inches, then hot glue the lace down the center of the burlap. Sew a medium button to one end with embroidery thread and stitch a simple loop at the other end so it wraps around the button as a closure. Hot glue a large decorative flower to the front center and let everything dry before pulling the curtain back.
Get the full tutorial at Penny Pinchin' Mom.
26. DIY Barnwood Shutters
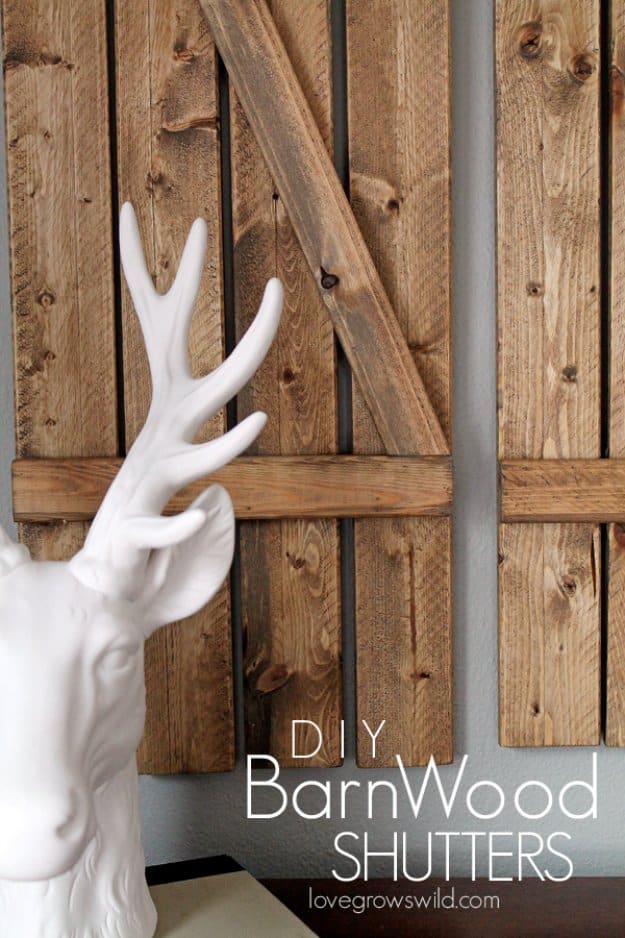
Faux barn wood shutters fill a blank wall for under $12 in lumber. Three shutters take six 1×3 furring strips and two 1×2 strips, cut on a miter saw or with a miter box and hand saw. Lay out the vertical boards, then nail and glue the 1×2 crosspieces and a diagonal brace across them with 1 inch nails. Stain or paint them to match the room, then lean or hang them over a fireplace or mantel. Furring strips are small and cheap, which keeps the whole build light.
Get the full tutorial at Love Grows Wild.
27. $12 DIY Roman Shade From a Mini Blind
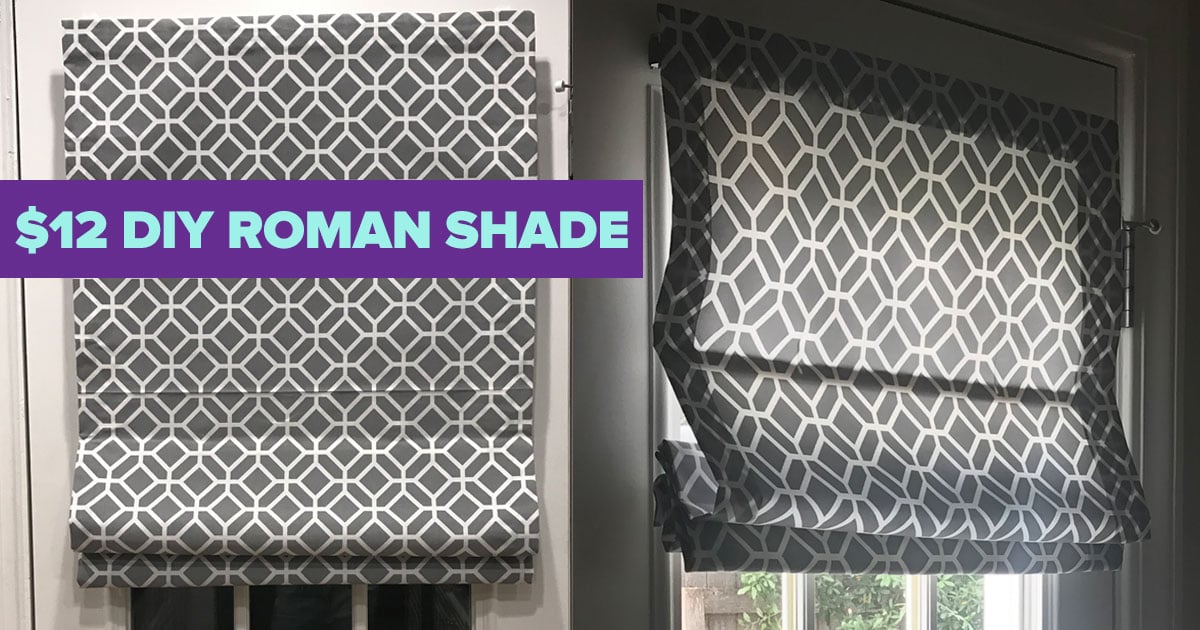
This Roman shade starts with a cheap cordless mini blind, so the lifting mechanism is already built in. Cut fabric with a 3 inch allowance on every side, fold and iron 1.5 inch hems, and seal the creases with fabric glue. Pull the lift cords out of the blind, tie buttons on them so they don’t retract, then cut away the ladder cord and remove all but three slats. Glue the top rod, three evenly spaced slats and the bottom rod to the fabric, rethread the cords and hang it.
Get the full tutorial at DIY JOY.
DIY Baskets, Lanterns and Lighting
28. DIY Metallic Rope Throw Basket
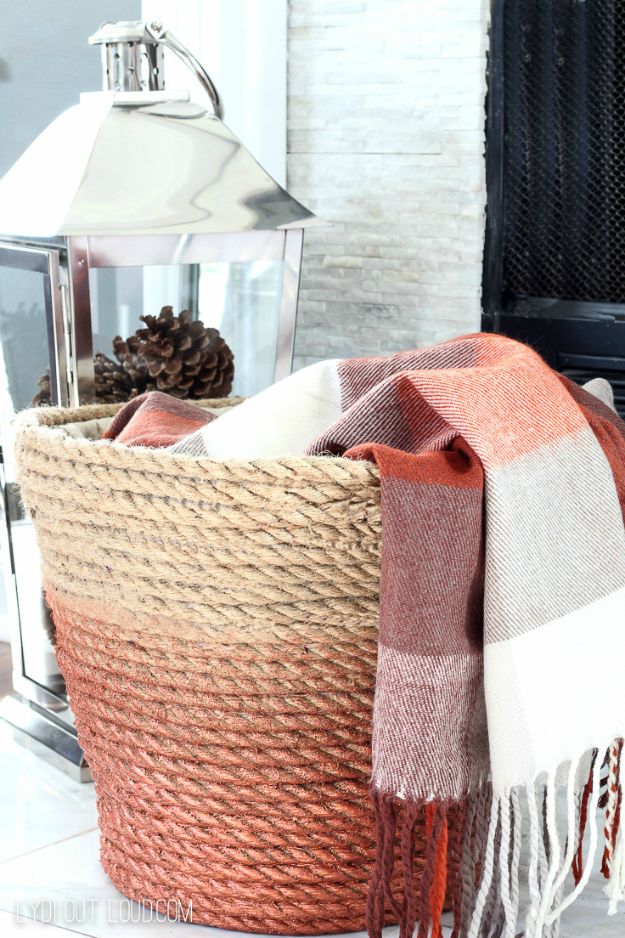
This metallic rope throw basket starts as a 96 cent dollar store laundry basket and comes together in under an hour. Hot glue felt, fleece or muslin to the base, folding pleats as you go, and run it up the side seam without trimming the top. Starting at the bottom, glue about 50 feet of half inch jute rope around the outside in tight rows. Paint the lower section with a metallic copper decor paint, then fold the excess fabric over the rim. A utility knife trims the basket edge if needed.
Get the full tutorial at Lydi Out Loud.
29. DIY Beaded Plant Hanger and Lantern
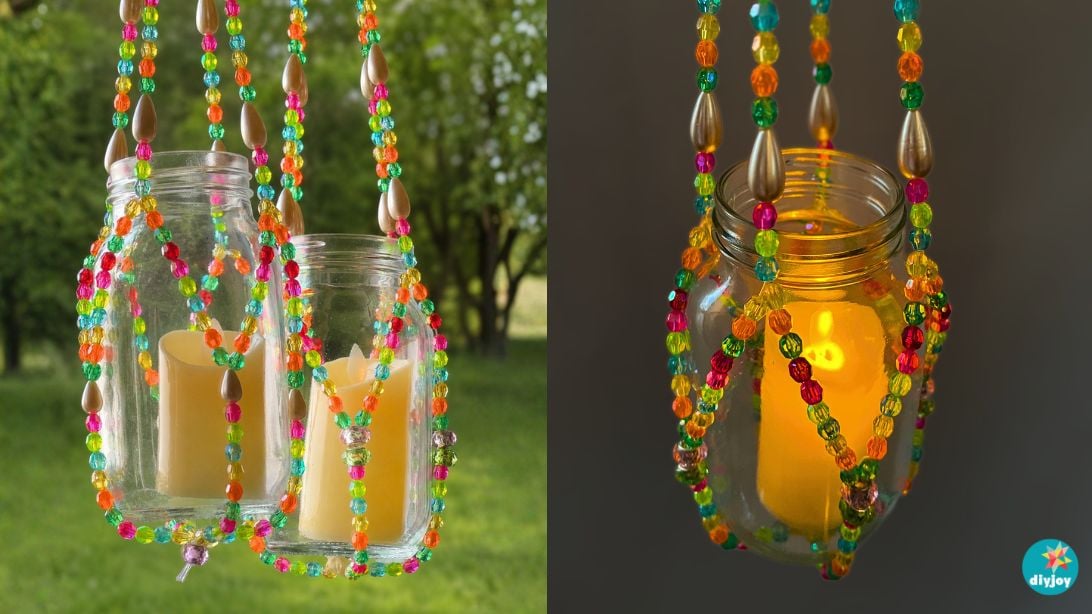
This beaded hanger works two ways: as a lantern holding a candle jar or as a planter for a small pot. Cut four 5 foot lengths of fishing line, fold them through a small wooden ring and tape the ring down. Pair the eight strands and string runs of 8mm glass beads with 14mm spacer beads until each strand reaches about 16 inches. Split and regroup the strands, adding beads to form the cradle, then knot all eight at the bottom. Drop in a jar or planter and hang it.
Get the full tutorial at DIY JOY.
30. DIY Hurricane Lanterns
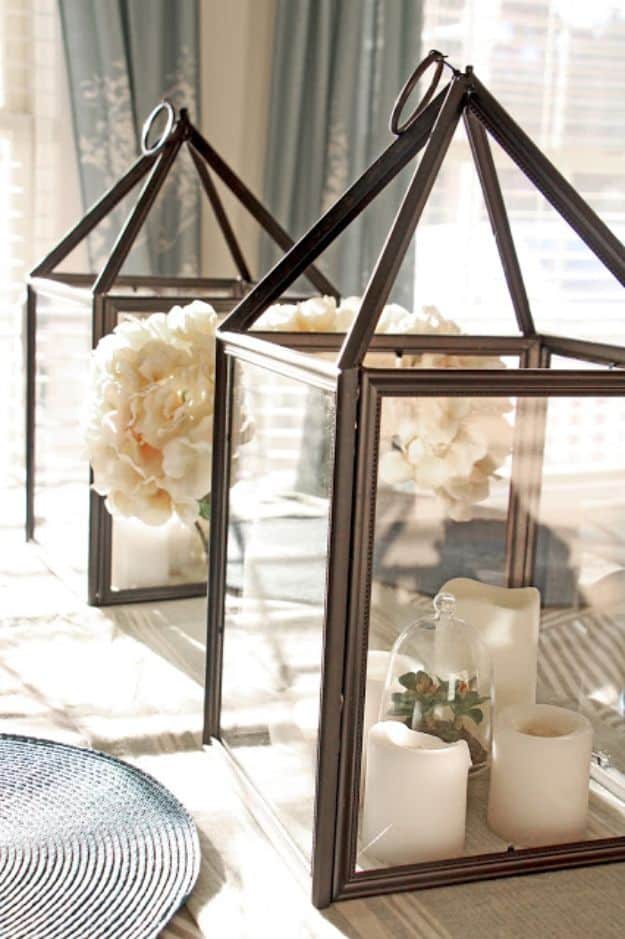
These hurricane lanterns are made from five matching dollar store picture frames, so each one costs about $5. Remove the paper backing and fold down the frame tabs to lock the glass in. Hot glue four frames into an open cube, or use Gorilla Glue and wait 24 hours for a sturdier lantern. Break down the fifth frame and glue its pieces into a pyramid top, then add a curtain ring or heavy rope for a handle. A heavy black marker covers any visible glue. They take about 30 minutes.
Get the full tutorial at Grosgrain.
31. Easy DIY Fairy Jar Lanterns
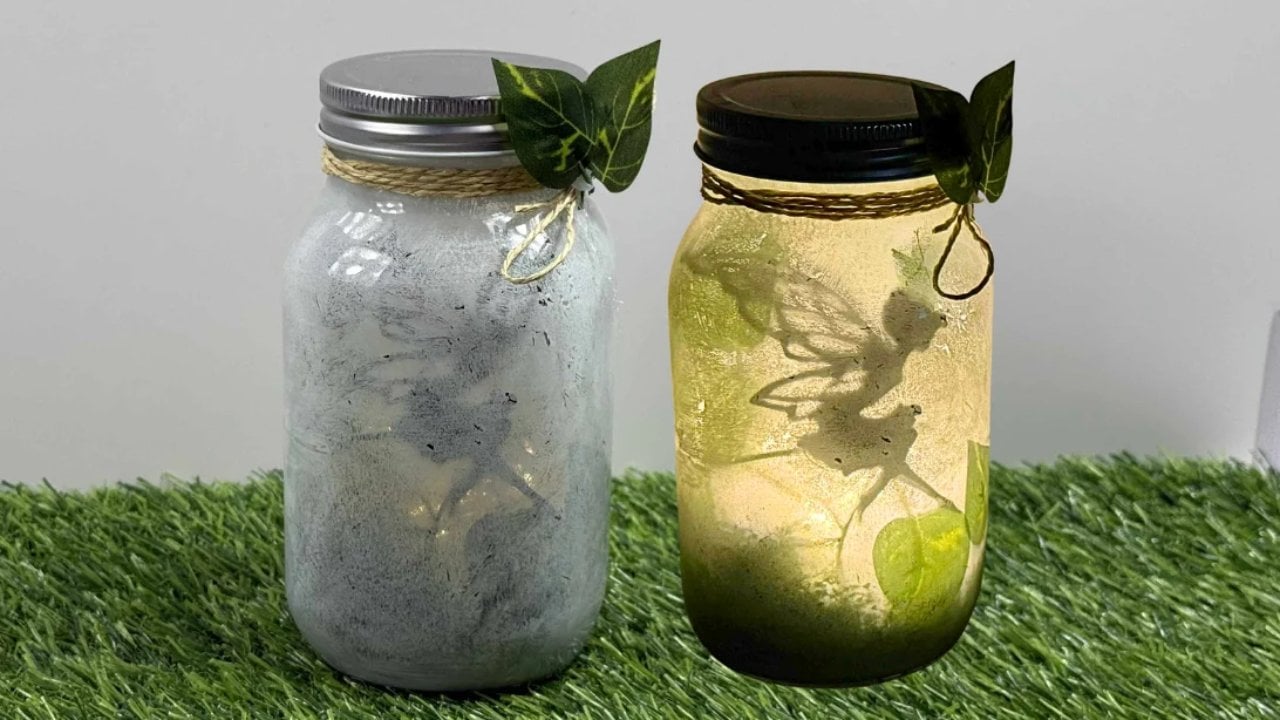
A fairy jar lantern gives off a soft, cozy glow that’s perfect beside a sofa or on a bookshelf. Print a fairy silhouette, or trees, mushrooms or a tiny house, and cut out the shape. Paint the inside of a glass jar with white acrylic or primer, keeping the coat thin enough for light to pass through. Add fake moss at the bottom, hot glue the silhouette and a few leaves inside, then drop in a tea light or fairy lights. A twine bow with leaves dresses up the lid.
Get the full tutorial at DIY JOY.
32. Mason Jar Fairy Lights With Pressed Flowers
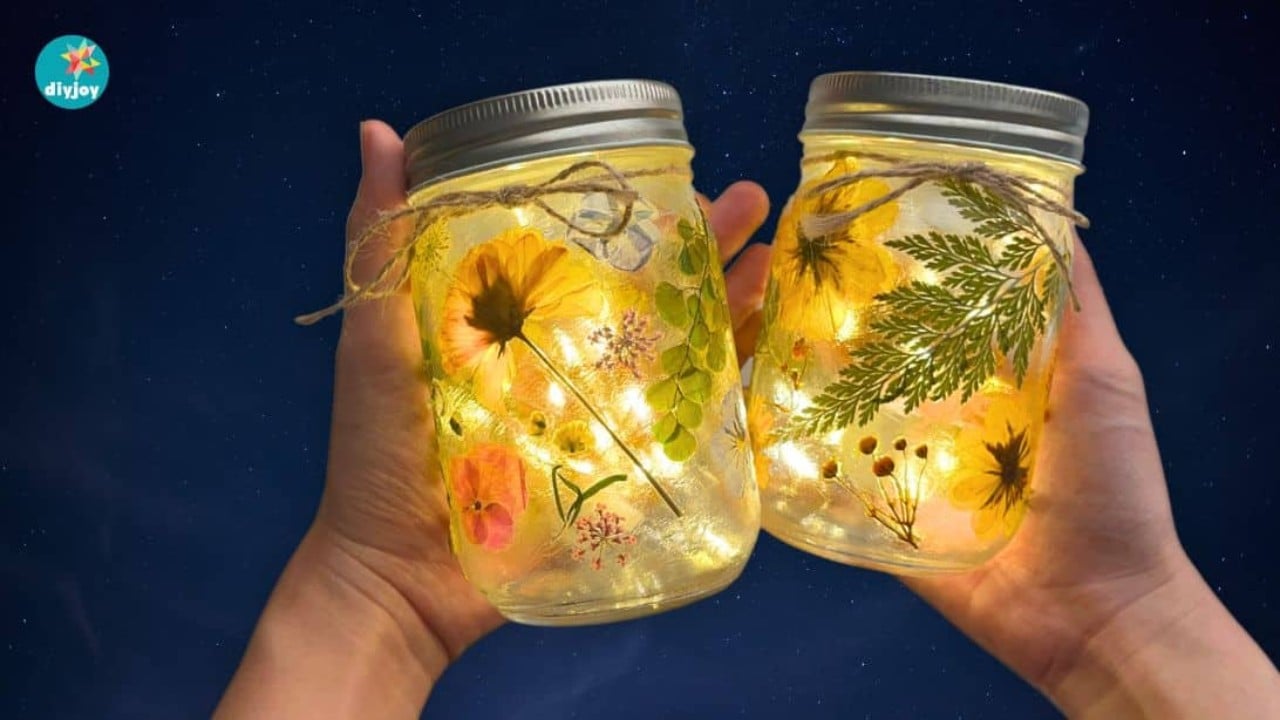
Mason jar fairy lights with pressed flowers glow like a garden at night. Clean the jar well and dry it completely. Plan the flower layout first, then brush a thin layer of Mod Podge onto one section of glass, press a flower in place and brush more glue over the top. Work a small area at a time so the glue stays wet, and trim bulky stems or tuck a bloom over the end of a stem to hold it down. A second coat seals everything before the fairy lights go in.
Get the full tutorial at DIY JOY.